How do you wrap gifts like a professional? The secret is precision: measure your paper before cutting, create sharp creases along every fold, use double-sided tape for invisible seams, and finish with coordinated ribbons or bows. Professional-looking wrapping doesn’t require expensive materials or natural talent, just attention to a few key techniques that most people skip in their rush to get gifts under the tree.
Whether you’re wrapping a simple box or tackling an awkwardly shaped item, these methods will elevate your presentation. Well-wrapped gifts signal care and thoughtfulness before the recipient even opens them.
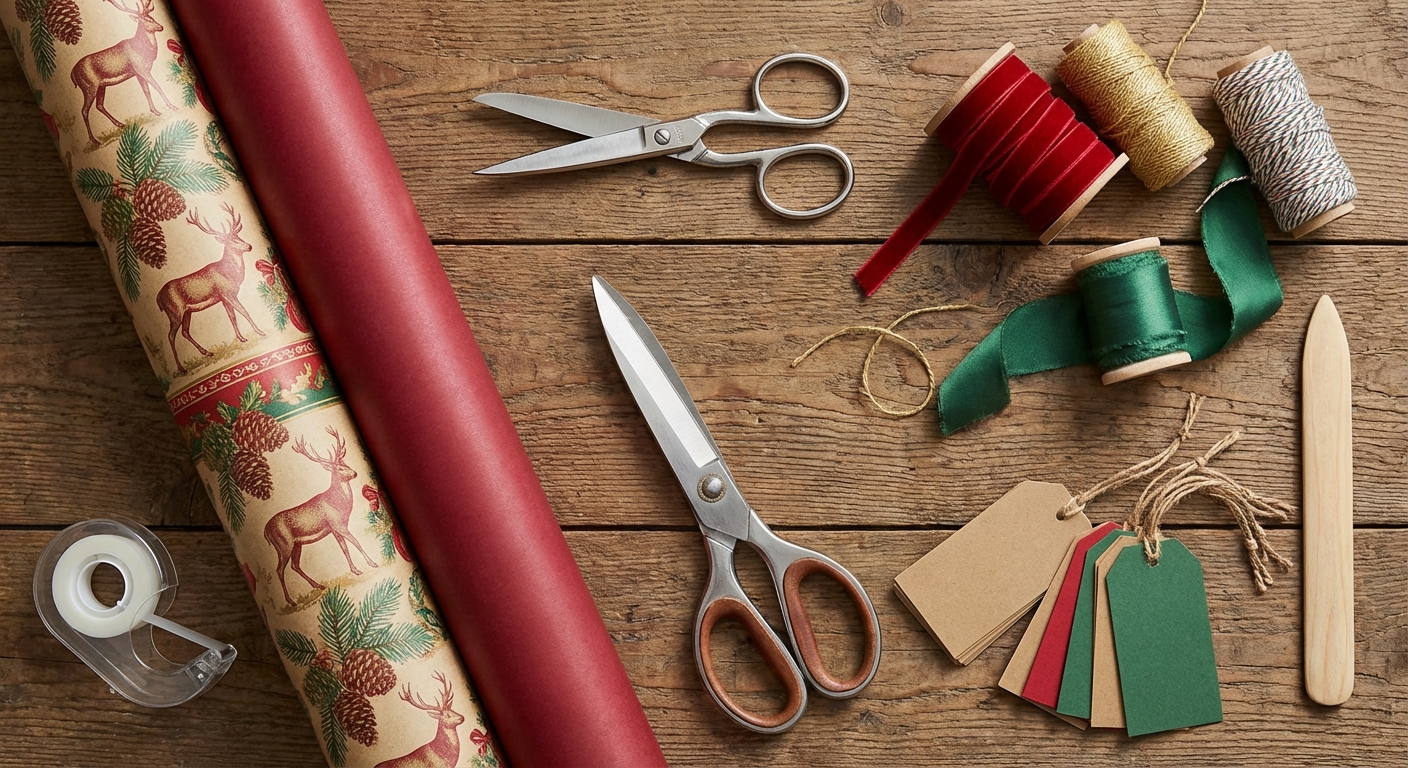
Gather the Right Supplies
Good wrapping starts with proper materials. You’ll need wrapping paper, sharp scissors, tape (double-sided tape makes a significant difference), ribbon or other embellishments, and a clean, flat work surface.
Invest in decent wrapping paper. Thin, flimsy paper tears easily and shows every imperfection. Mid-weight paper with a matte or subtle texture hides mistakes better than glossy paper, which highlights every wrinkle. Kraft paper is forgiving and looks elegant with simple ribbon.
Sharp scissors are essential. Dull scissors tear paper edges rather than cutting cleanly. Dedicated wrapping scissors that only cut paper stay sharp longer than multi-purpose scissors. A bone folder or credit card helps create crisp creases, though your fingernail works in a pinch.
Measure and Cut Paper Precisely
The most common wrapping mistake is cutting too little or too much paper. Too little leaves gaps. Too much creates bulky, awkward folds. Measure before cutting.
Place your box upside down on the paper. Roll the box once to determine width, adding about two inches for overlap. Check that the paper extends up the sides to about two-thirds of the box height. Mark lightly with pencil if needed, then cut in a straight line. Using the paper roll’s edge or a ruler as a guide helps maintain a straight cut.
For multiple gifts of similar size, cut all the paper at once after measuring one piece. This saves time and ensures consistency. Store measurements for boxes you wrap regularly, like shoeboxes or book-sized items.
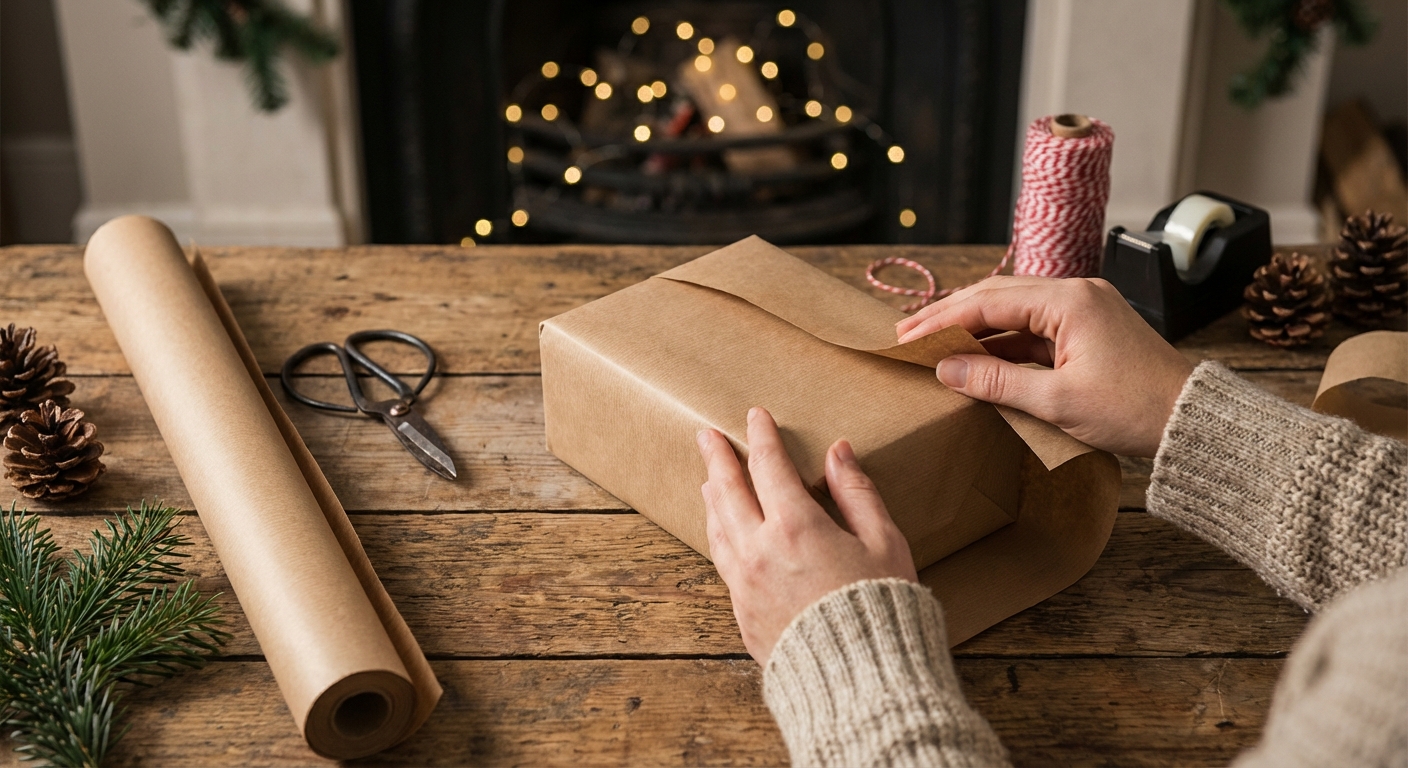
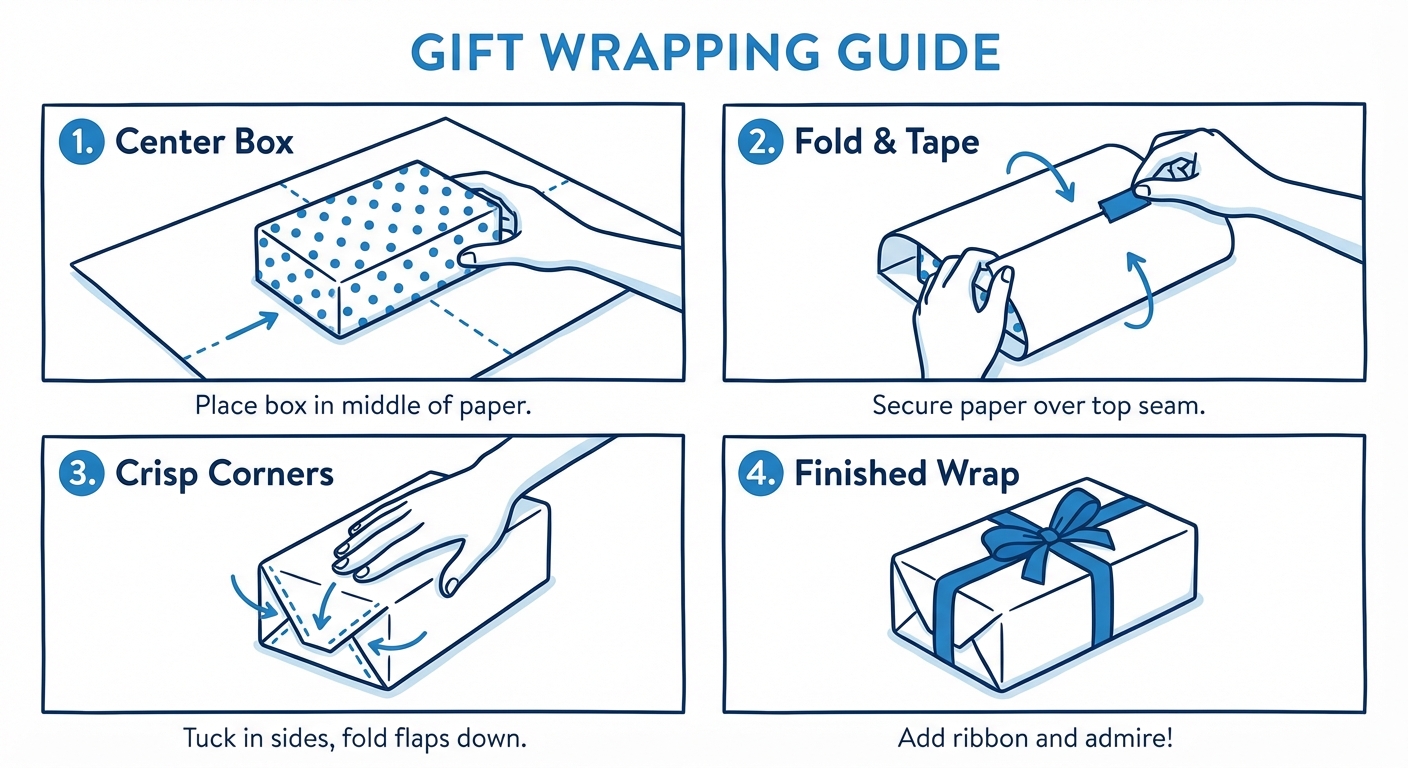
Master the Basic Wrap
With the box upside down on the paper, pull one side of paper up and tape it to the box center using double-sided tape. Pull the opposite side over, folding under a half-inch for a clean edge, and tape it down overlapping the first piece.
For the ends, fold the top flap down and crease it sharply against the box edge. Fold the side flaps in, creasing each fold crisply. The triangular points should meet neatly. Fold the bottom flap up, tucking the edge under slightly for a finished look, and tape.
The key is creating crisp creases. Run your finger or a bone folder firmly along every fold. Sharp edges give wrapped gifts their polished, professional appearance. Soft, rounded folds look amateur.
Use Double-Sided Tape
Double-sided tape is the single biggest upgrade you can make to your gift wrapping. Regular tape, no matter how carefully applied, shows on the surface and cheapens the look. Double-sided tape hides between layers for invisible seams.
Apply double-sided tape to the paper itself before positioning it on the box. For the main seam, put tape on the folded edge of the overlapping paper. For ends, apply tape to the final flap before pressing it into place.
If you don’t have double-sided tape, apply regular tape as close to folds and edges as possible, and use the smallest pieces that will hold. Clear tape is less noticeable than frosted or opaque varieties.
Handle Awkward Shapes
Not everything comes in a convenient box. For oddly shaped items, your best option is often to put them in a box first. Collect boxes of various sizes throughout the year, or purchase gift boxes at craft stores.
For cylindrical items like bottles, wrap them like a candy wrapper. Cut paper long enough to extend several inches beyond each end. Roll the item in paper, tape the seam, then gather the ends and tie with ribbon. Or use a gift bag.
For very large items, consider wrapping multiple pieces of paper together with seams at natural break points. For extremely awkward shapes, gift bags or fabric wrapping (furoshiki style) may be more practical and equally impressive.
Add Finishing Touches
A ribbon or bow transforms ordinary wrapping into a gift. The simplest finish is a single ribbon wrapped around the box and tied in a bow on top. Use ribbon about twice the box perimeter plus 12 inches for the bow.
For a more elaborate look, wrap ribbon around the box both directions to form a cross, tying the bow at the intersection. Curl ribbon ends by running them firmly along a scissors blade. Layer multiple thin ribbons for visual interest.
Add a gift tag that matches your paper and ribbon. Fresh greenery, like a small pine sprig or holly leaves, adds an elegant natural touch. Dried orange slices, cinnamon sticks, or small ornaments create memorable, personalized presentations.
Troubleshooting Common Problems
If your paper tore while wrapping, strategic ribbon placement or a decorative sticker can cover small tears. For larger tears, rewrap if you have enough paper.
Wrinkled paper can sometimes be smoothed with a cool iron on low heat before wrapping, but this works best on matte paper. Once wrapped, wrinkles are permanent, so work on a clean, flat surface and keep the paper smooth as you fold.
If your corners look bulky, you probably have too much paper. Trim the side flaps before folding if they extend past the box edge. Thinner folds create neater corners.
Summary
Professional gift wrapping requires measuring paper precisely, creating sharp creases along every fold, using double-sided tape for invisible seams, and adding coordinated finishing touches. Start with decent materials: mid-weight paper that doesn’t tear easily and scissors that cut cleanly.
Master the basic box wrap first, then adapt for awkward shapes using boxes, bags, or creative techniques. Ribbon and a simple bow transform any wrapped gift. With practice, these techniques become second nature, and your gifts will look as thoughtful on the outside as they are on the inside.